Tools and Services
Browsers
Browsers is the gateway to the world wide web and your web sites. How a browser renders a page and its compatibility with modern techniques with vary with each type and version. This way it is important to test your web site on as many browsers and devices as possible.
Desktop Browsers
Chrome
The latest version of Chrome can be downloaded at https://www.google.com/chrome/
Default Browser
It is recommended to make Chrome your default browser. This can be done from the Chrome Settings page.
Firefox
The latest version of Firefox can be downloaded at https://www.mozilla.org/en-US/firefox/
Opera
The latest version of Opera can be downloaded at https://www.opera.com/
Configure Desktop Browsers
Chrome
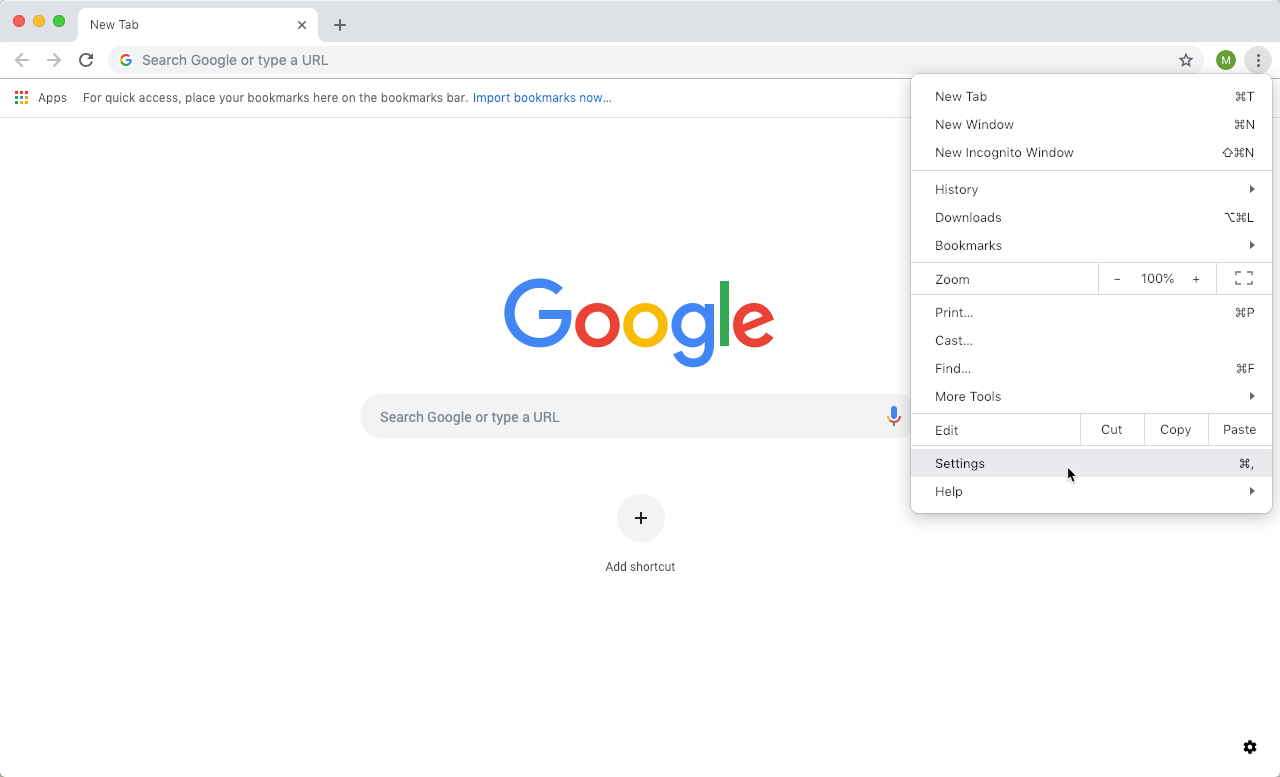
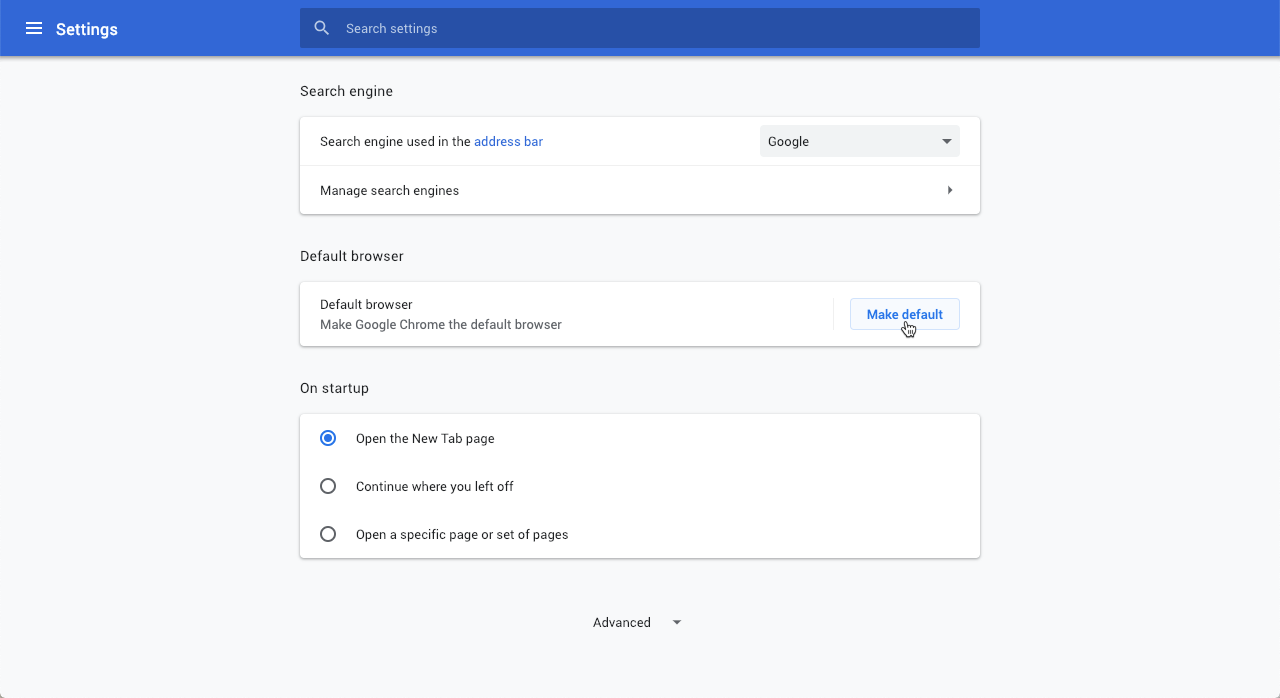
It is recommended to make Chrome your default browser. This can be done from the Chrome Settings page.
- With Chrome open, click the More button
- Select Settings
- Search or scroll until you find the Default Browser. Click the "Make Default" button.
Chrome DevTools
The Chrome DevTools are a set of web authoring and debugging tools built into Google Chrome. Use the DevTools to iterate, debug and profile your site.
For more information on how to use Chrome DevTools, see the Chrome DevTools Documentation.
Safari (macOS only)
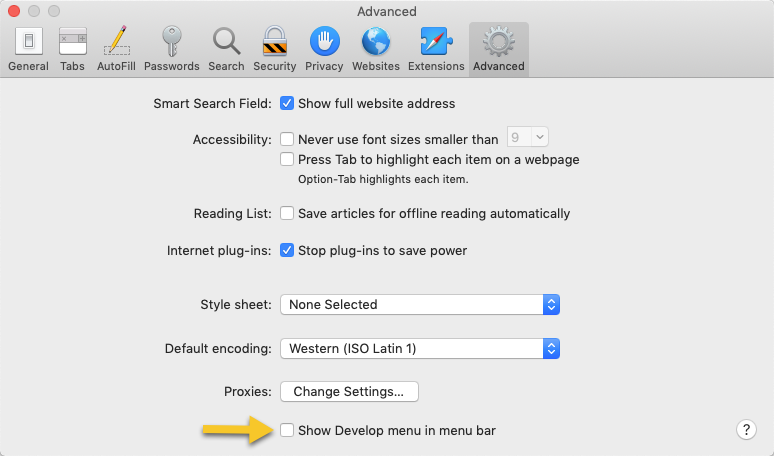
By default, access to the developer tools in Safari is turned off. Follow the steps below activate the developer tools:
- While in Safari, open Safari's Preferences found under Safari > Preferences
- Select the Advanced tab
- Check the "Show Developer menu in menu bar" box
Mobile Browsers
More traffic is now accessing the web from mobile devices than from traditional desktop computers, so it especially important to test your site on these mobile browsers. It is encouraged that you install the following browsers on your mobile devices:
GitHub
GitHub is a web-based hosting service for git repositories. Git is a version control system for tracking changes in computer files and coordinating work on those files among multiple people. While it is mostly using for programming code, GitHub can be use host git repositories holding any kind of text documents. We will not be using GitHub or git in this class, but you will be learning how to use these tools later in the program.
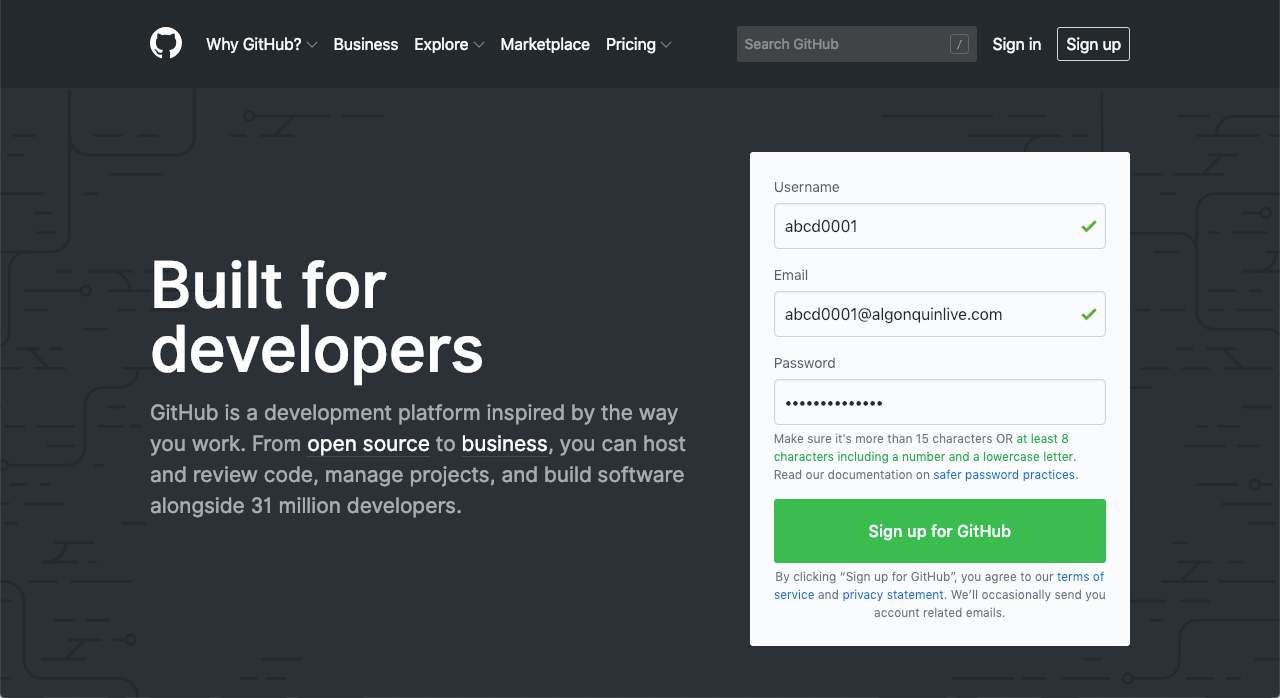
Creating GitHub Account
To create GitHub Account, go to https://github.com and provide a username, an email address, and password. Please use your official Algonquin College email address and student username (i.e. abcd0000) for the sign-up.
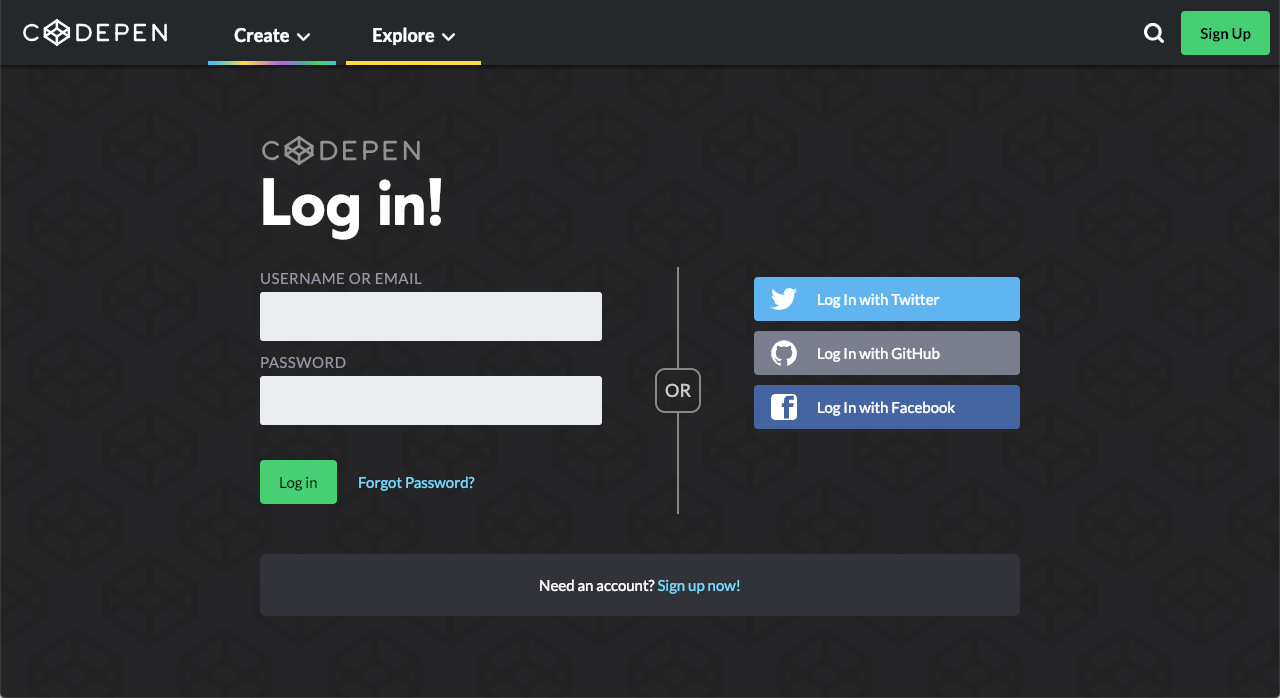
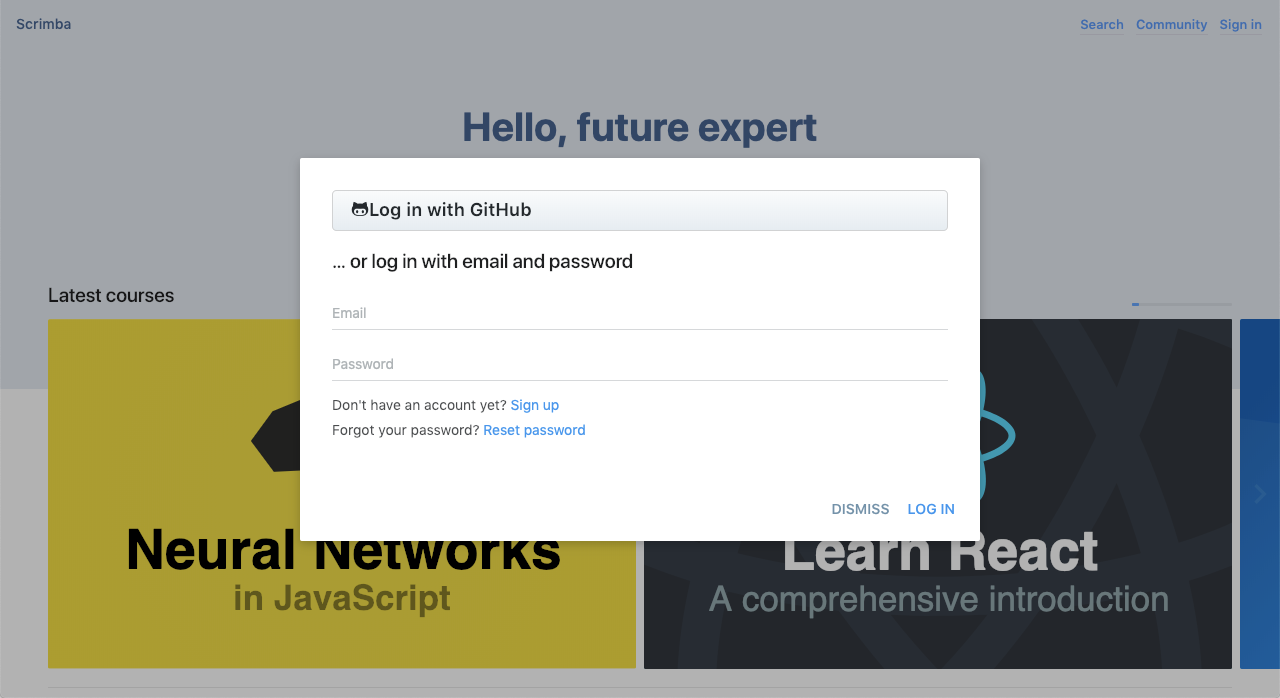
Log In with Github
It is possible to use GitHub Account for other services as well like CodePen and Scrimba.
CodePen
CodePen is a social development environment for front-end designers and developers. Explore and create new pens is an learn, practice and master your skills as a developer.
Scrimba
Scrimba is a new way of teaching and learning how to code through the use of interactive screencasts. Pause the videos at any time to interact with the code on the screen.
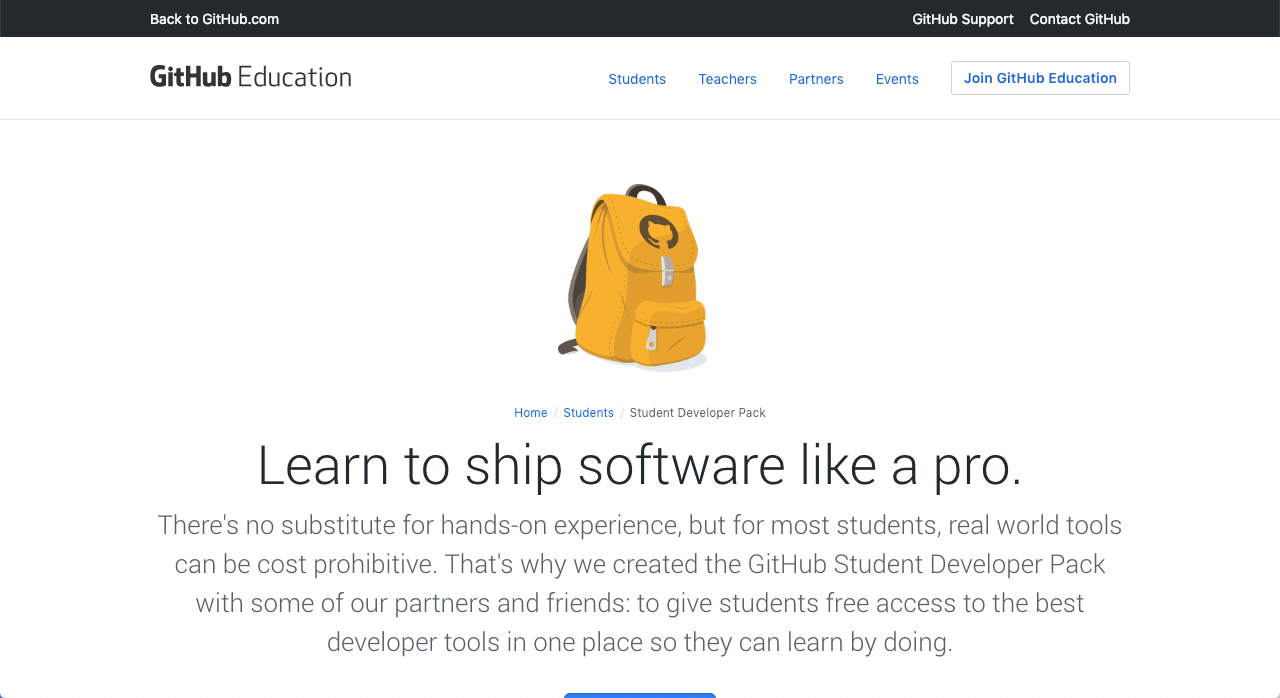
Student Development Pack (Optional)
After you have create a GitHub Account, you can get the GitHub Student Development Pack. This will give you access to Development Software and Services for free. Getting the Student Development Pack is optional.
Git
Git is a free and open source distributed version control system and use to managed the versioning of any text-based project.
Installing Git for Windows
Complete the following steps to install the latest version of Git on Windows:
- Go to https://git-scm.com/downloads/
- Download the software for Windows
- Install Git choosing all of the default settings
After the installation is complete, find and open Git Bash from the Windows Start menu, and type git --version. If a version number appears, Git has been successfully installed.
Before you can start using Git for the first time, you need to configure it. Run each of the following lines in the Git Bash. You will only need to do this once.
# sets up Git with your name
git config --global user.name "Your Name"

# sets up Git with your email (use your Algonquin Email)
git config --global user.email "youremailaddress@algonquinlive.com"

# makes sure that Git output is colored
git config --global color.ui auto
This video was created by Atlassian
Installing Git for macOS
Git is commonly installed on MacOS by default, but it is good idea to reinstall git, to ensure we are running the latest version.
- Go to https://git-scm.com/downloads
- Download the software for Mac
- Install Git choosing all the default options
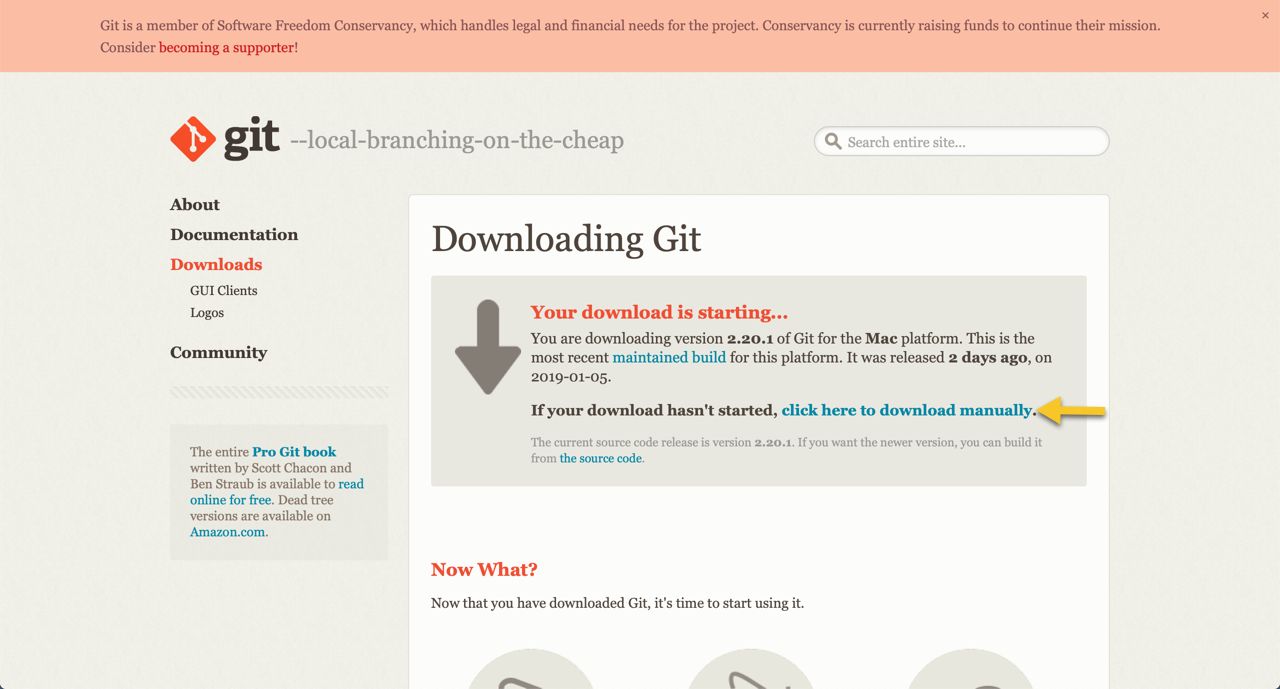
Download Manually (macOS)
The Git download may not start automatically, so you may have to download manually by using the link provided
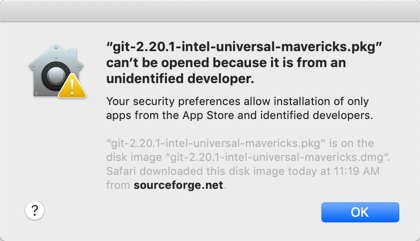
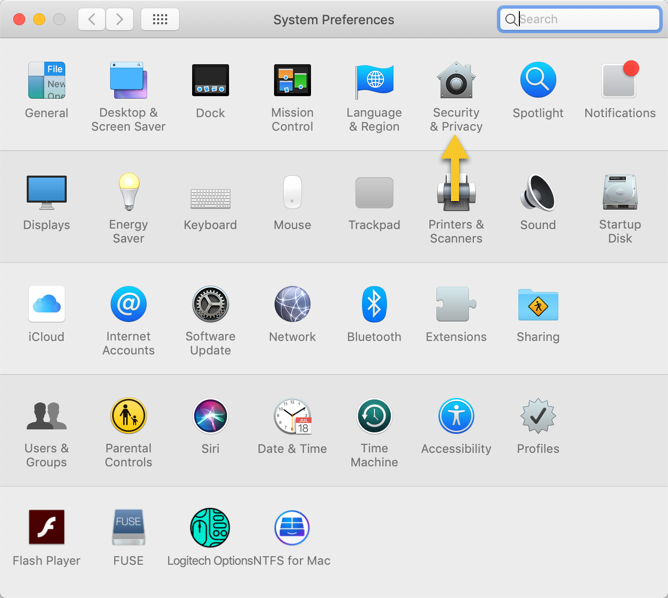
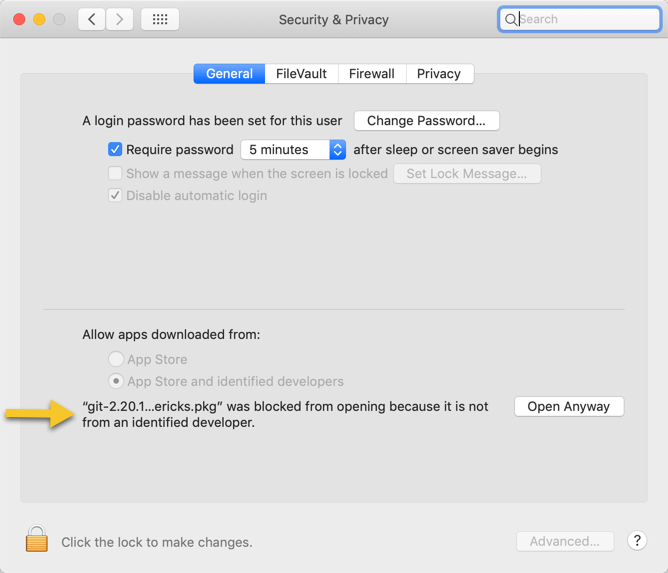
Security Block (macOS)
The Git Installation process may get block my macOS. If this happens you will need to open System Preferences go to Security & Privacy and under the General tab you will find a message that installer was block. Click the "Open Anyway" Button.
After the installation is complete, open the Terminal, it can be found in /Applications/Utilities/Terminal.app, and type git --version. If a version number appears, Git has been successfully installed.
Before you can start using Git for the first time, you need to configure it. Run each of the following lines in the Terminal. You will only need to do this once.
# sets up Git with your name
git config --global user.name "Your Name"

# sets up Git with your email (use your Algonquin Email)
git config --global user.email "youremailaddress@algonquinlive.com"

# makes sure that Git output is colored
git config --global color.ui auto
This video was created by Atlassian
Node.js
Node.js is a JavaScript runtime built on Chrome's V8 JavaScript engine. It is used for many different applications including using JavaScript as a server side language. Node.js as comes with Node Package Manager, the largest ecosystem of open source libraries in the world. We will not be directly working with Node.js in this class, but some of the resource we will use will rely on it.
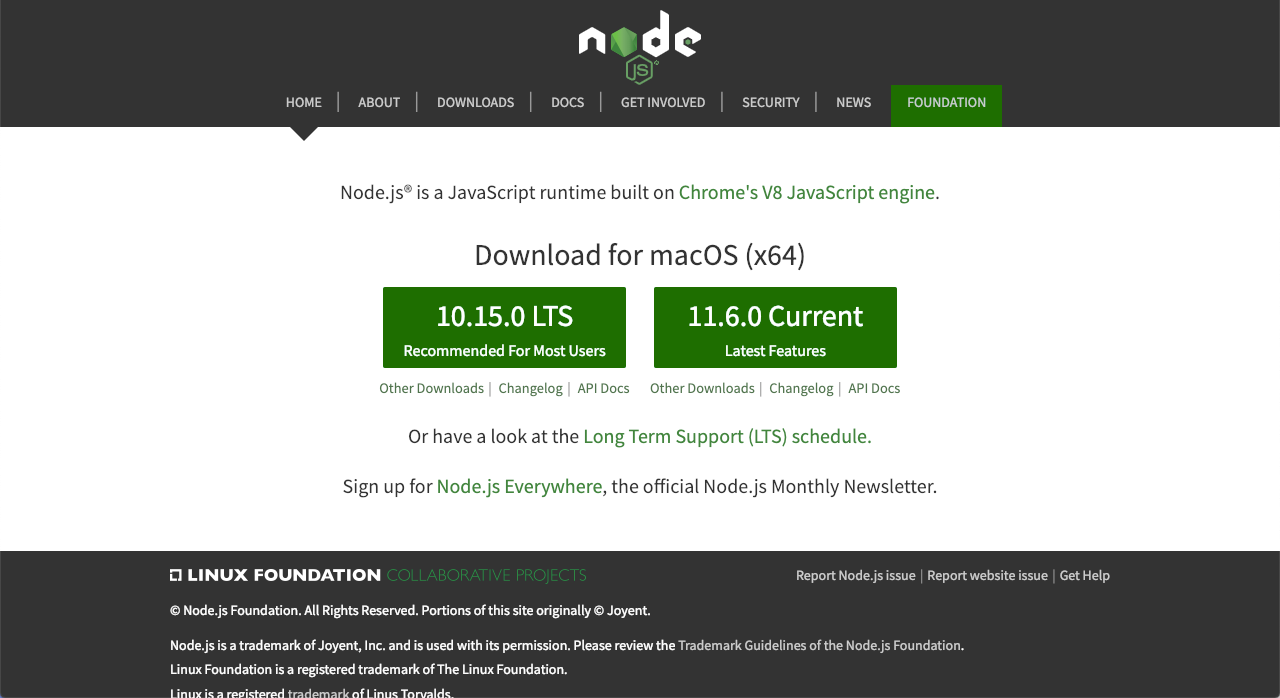
To install Node.js, go to the the Node.js Website, and download the installer for the Current version of Node.js.
NOTE
The Current version may be different than what is shown above. New versions of Node are release on a weekly basis.
Once downloaded, run the installer and follow the instructions to install Node.js and NPM.
Windows Only
On the Tools for Native Modules screen, make sure the checkbox for Automatically install the necessary tools is checked.
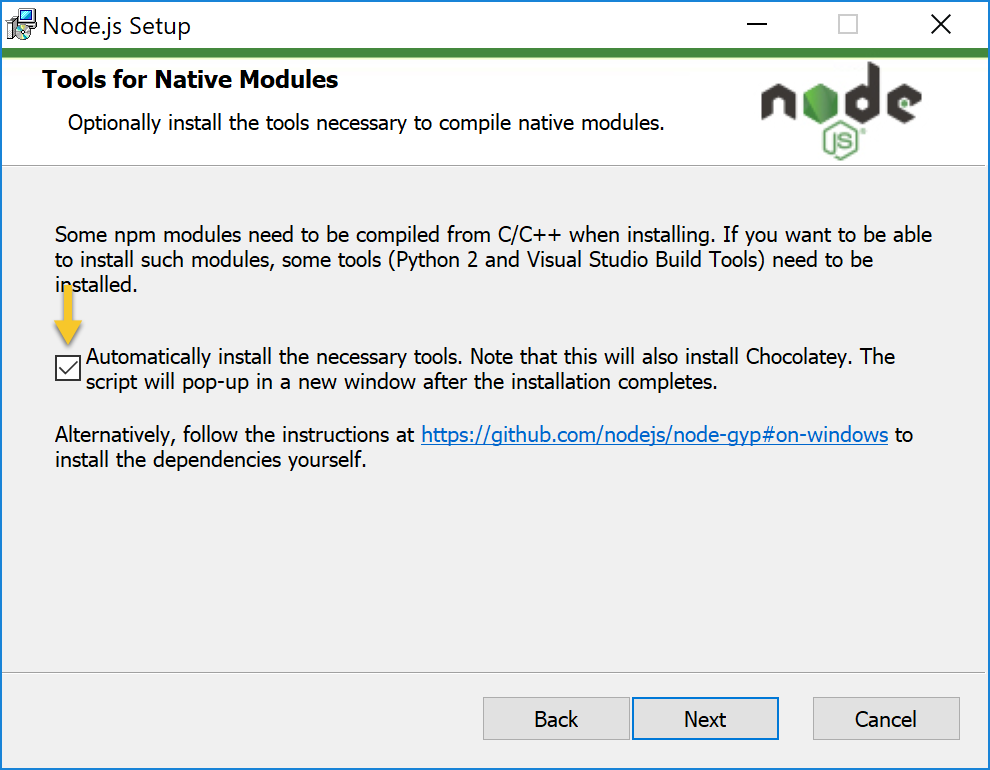
This will cause pop-up windows to open with additional instructions and request for permission. Agree to all requests.
Visual Studio Code
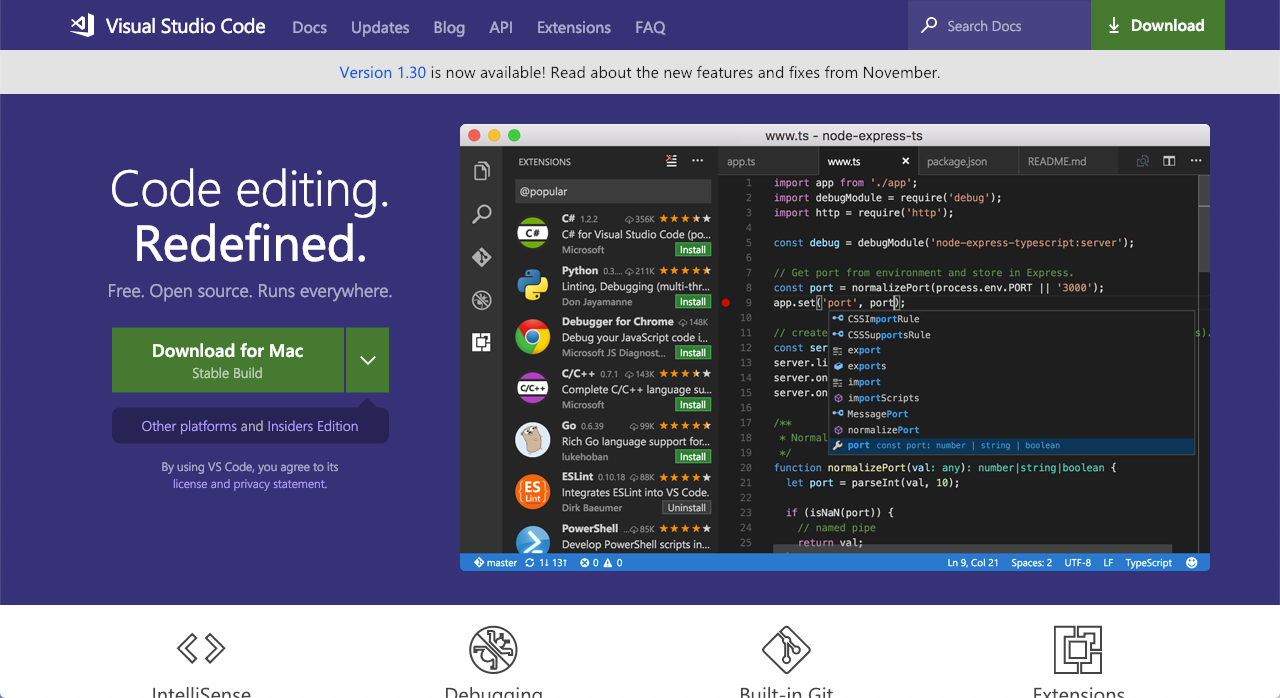
Visual Studio Code is an open source, free text editor created by Microsoft. Visual Studio Code is growing in popularity and already has a large library of extensions and themes. It is available for Windows, macOS and Linux.
Installing Visual Studio Code
To install the latest version of Visual Studio Code, go to the official website, https://code.visualstudio.com.
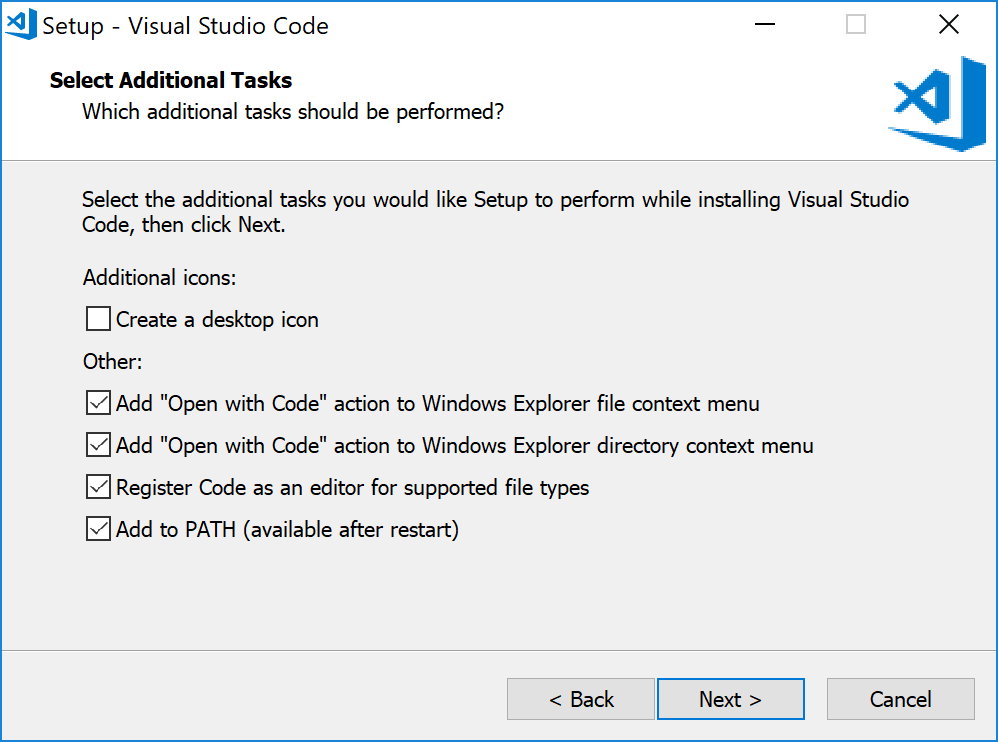
Installation Configuration (Windows Only)
When on the Select Additional Tasks of the installation process, make sure the following boxes are checked:
Add "Open with Code" action to Windows Explorer file context menu
Add "Open with Code" action to Windows Explorer directory context menu
Register Code as an editor for supported file types
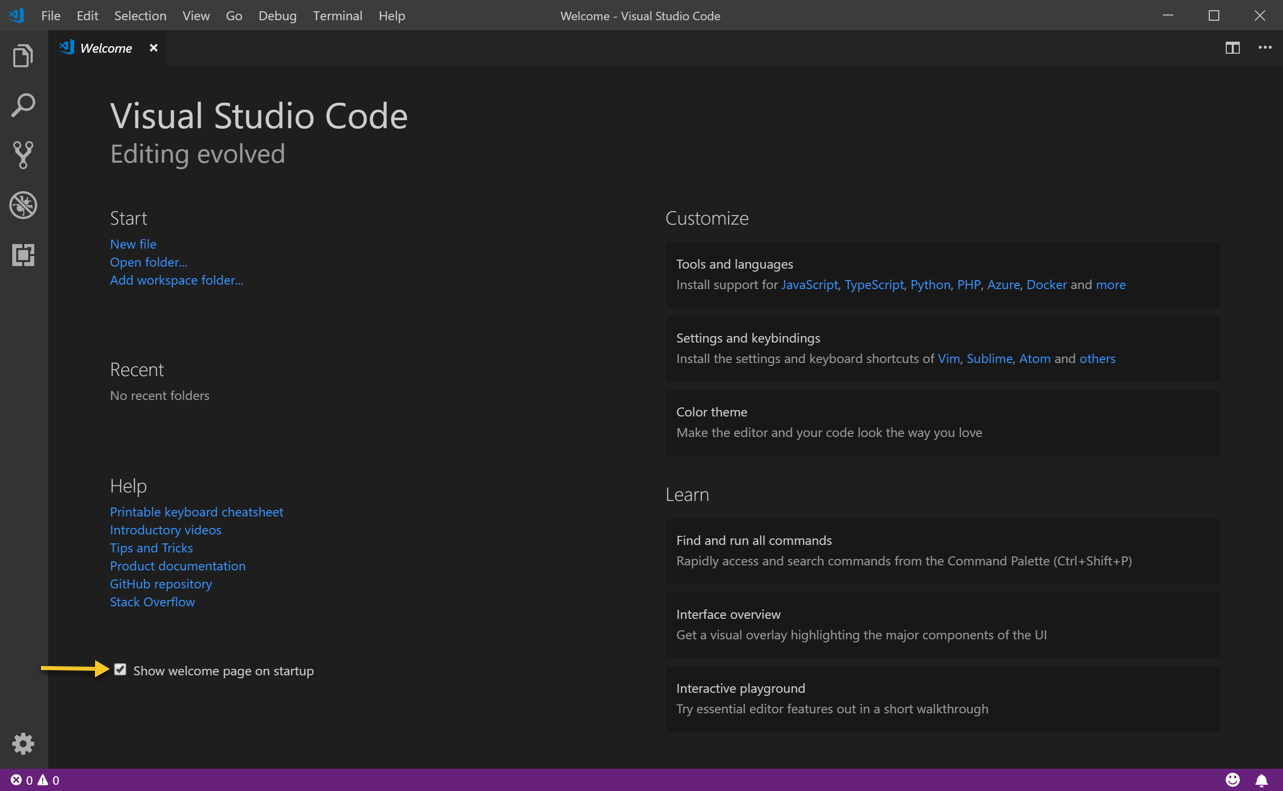
Welcome Page
When you launch Visual Studio Code for the first time, you will be presented with a Welcome Page with helpful tips for using and customizing Visual Studio Code
Configuring Visual Studio Code
When you launch Visual Studio Code for the first time, you will be presented with a Welcome Page with helpful tips for using and customizing Visual Studio Code. By default, this page will open every time you open Visual Studio Code. To prevent this, just uncheck the Show welcome page on startup found on the Welcome Page.
A set of predefined settings and extensions has already been created for the Interactive Media and Design program. These settings and extensions will be used using the Settings Sync extension.
The following tutorial will walk you through installing and using Settings Sync to configure your version of Visual Studio Code.
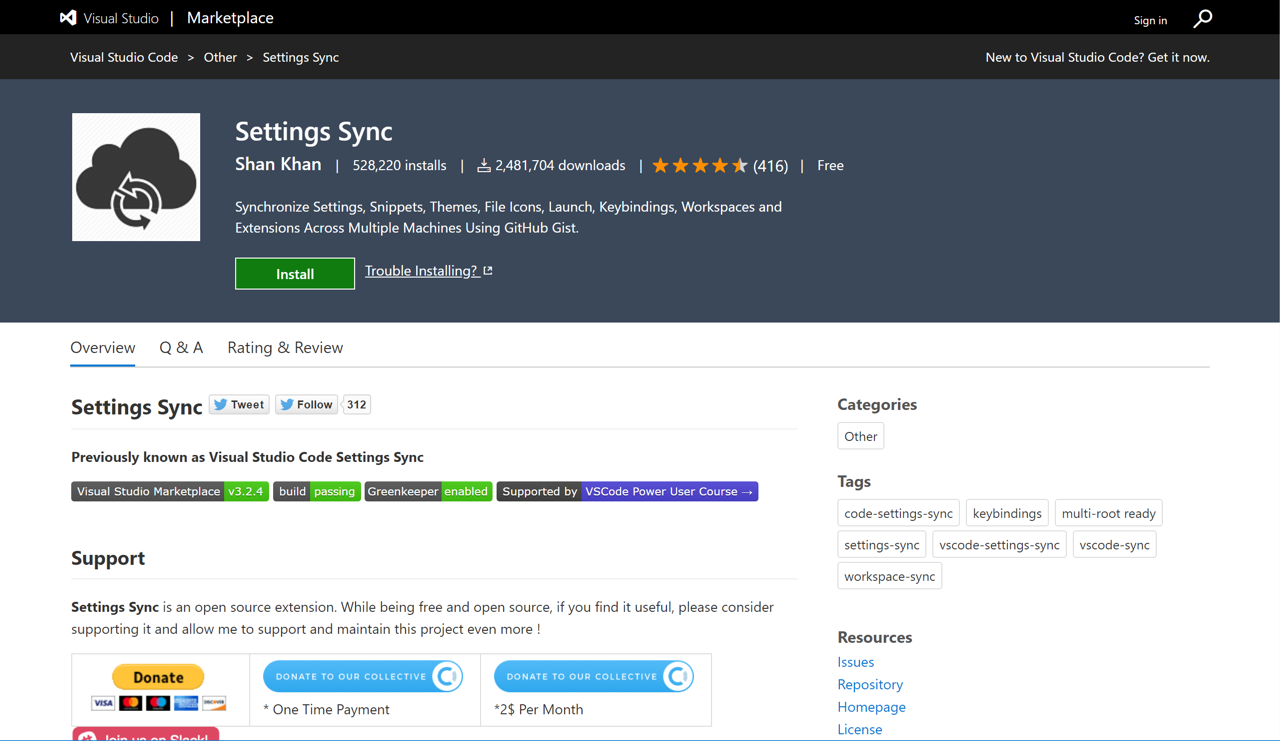
1. Installing Settings Sync
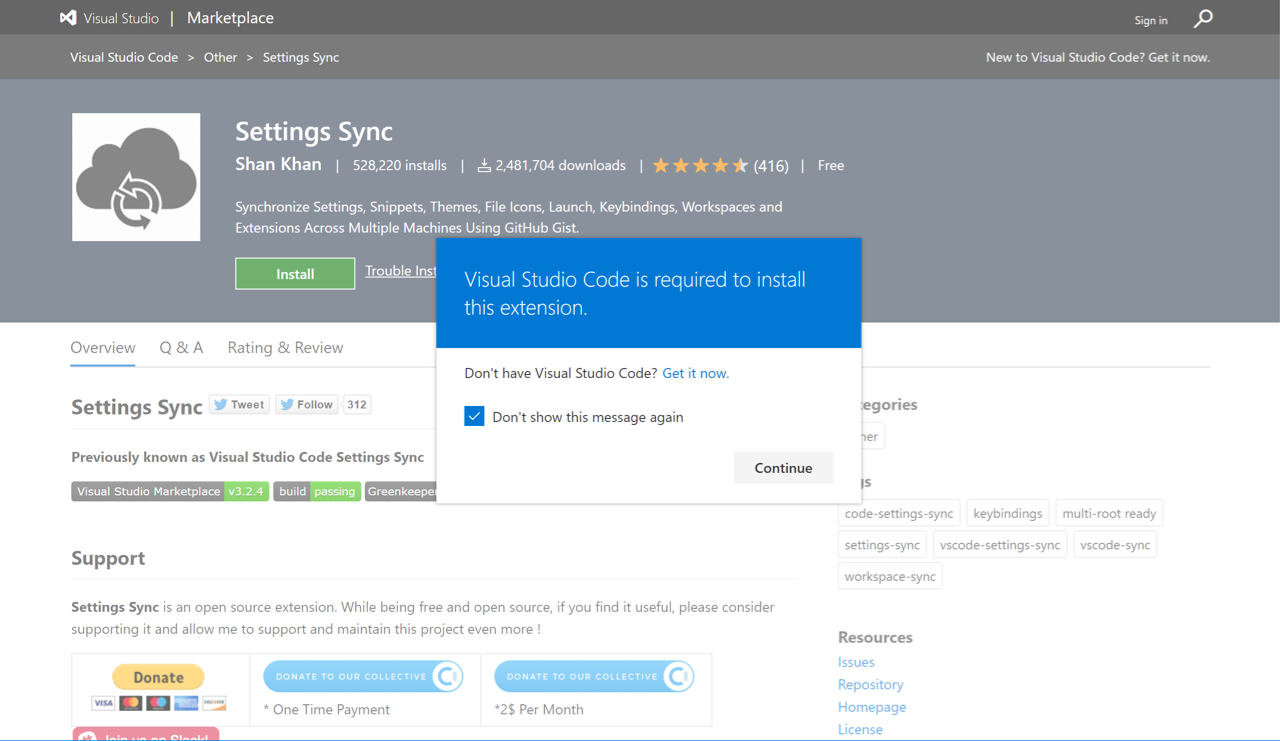
Go to the Settings Sync Visual Studio Marketplace page and click the "Install" button.
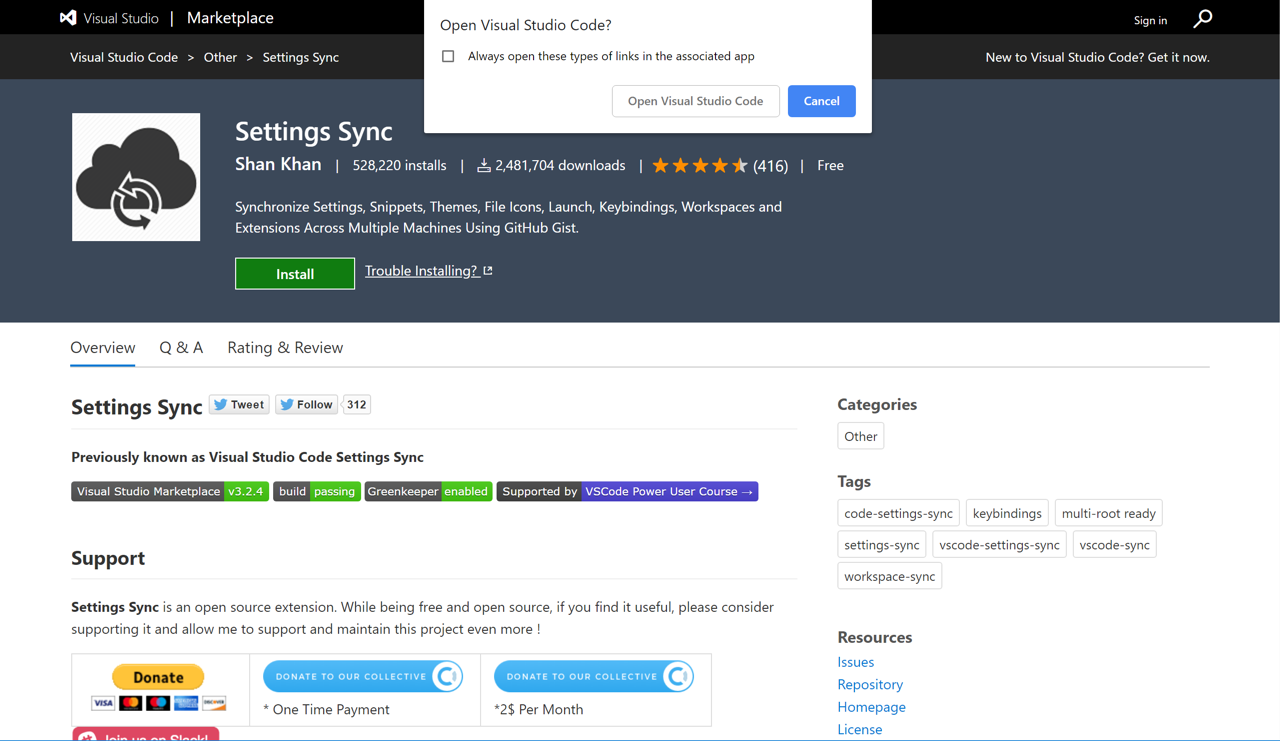
Grant Permission
You may receive an dialog box asking for permission to open Visual Studio Code.
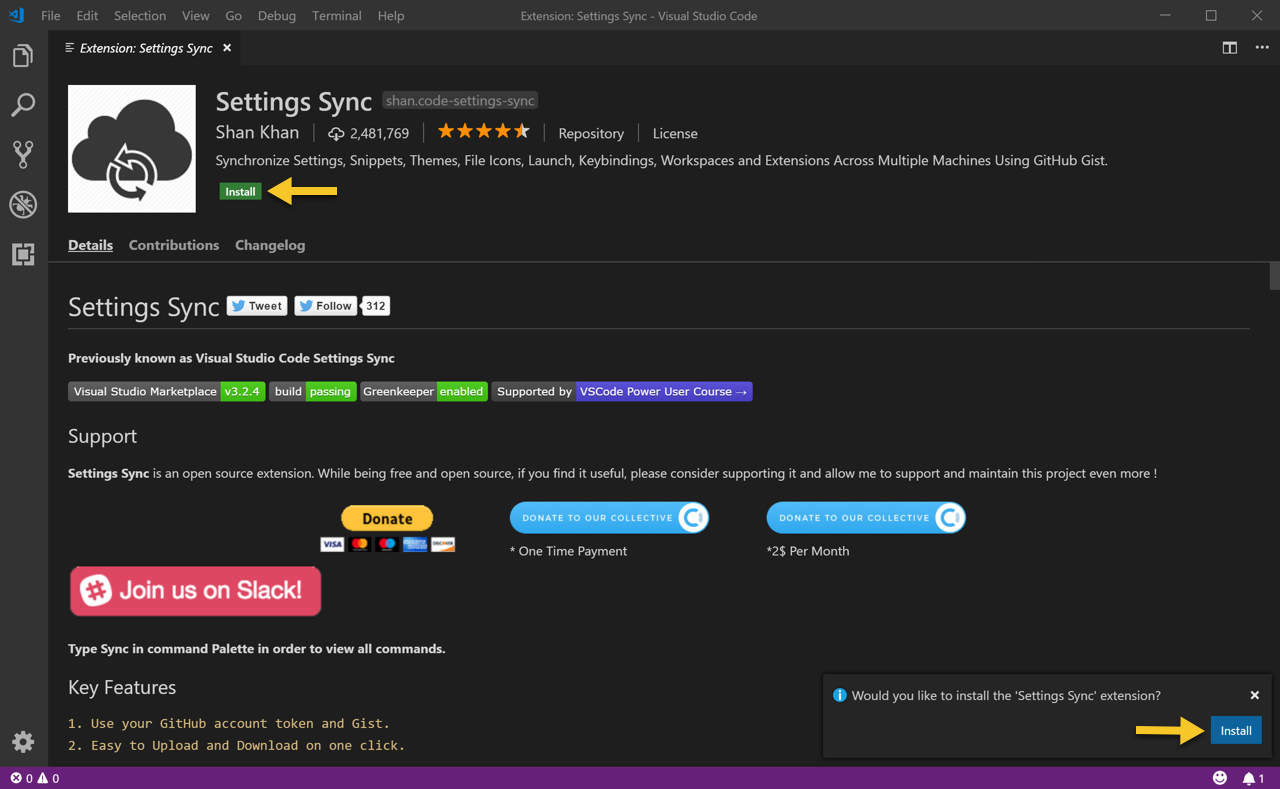
Visual Studio Code will launch and open the Settings Sync page. A dialog box will popup asking if you would like to install the 'Settings Sync' extension. Click "Install".
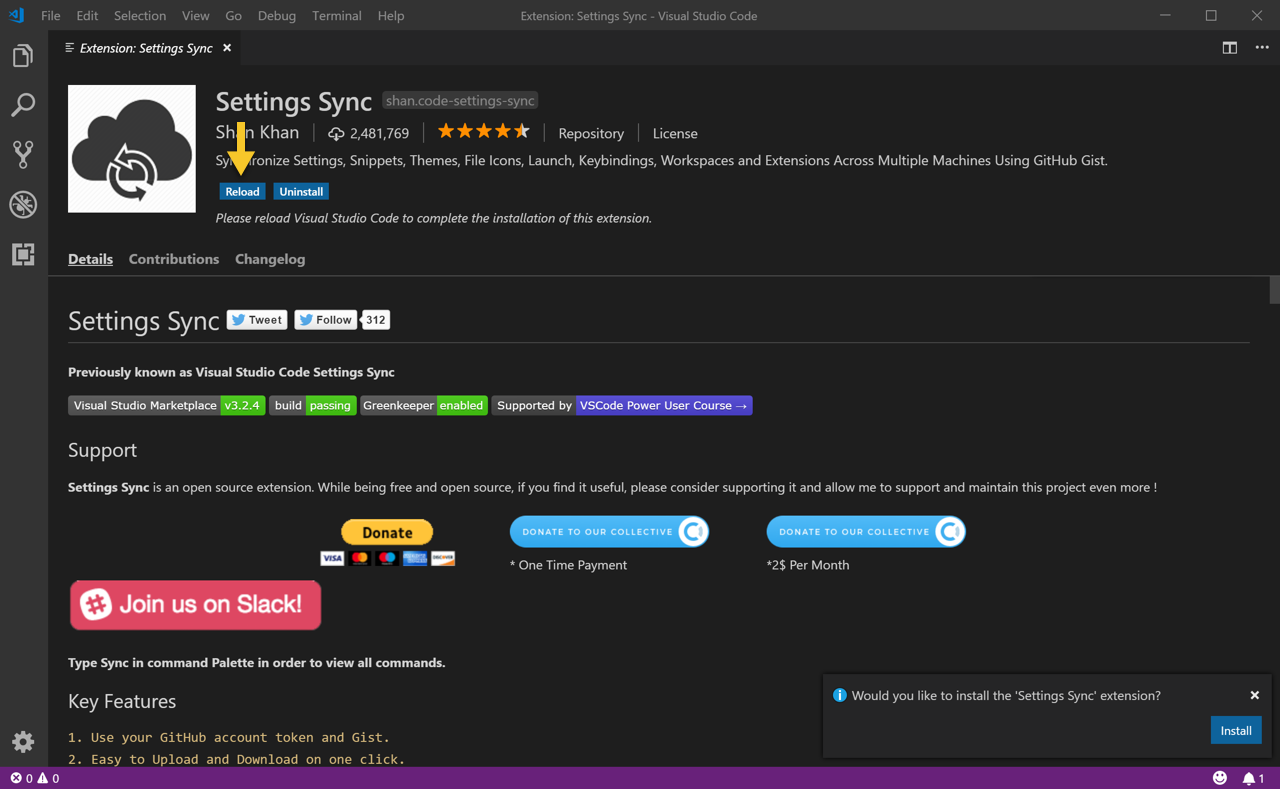
When the Installation is complete, click the "Reload" button. This will force Visual Studio Code to reload the window.
Configuring Settings Sync
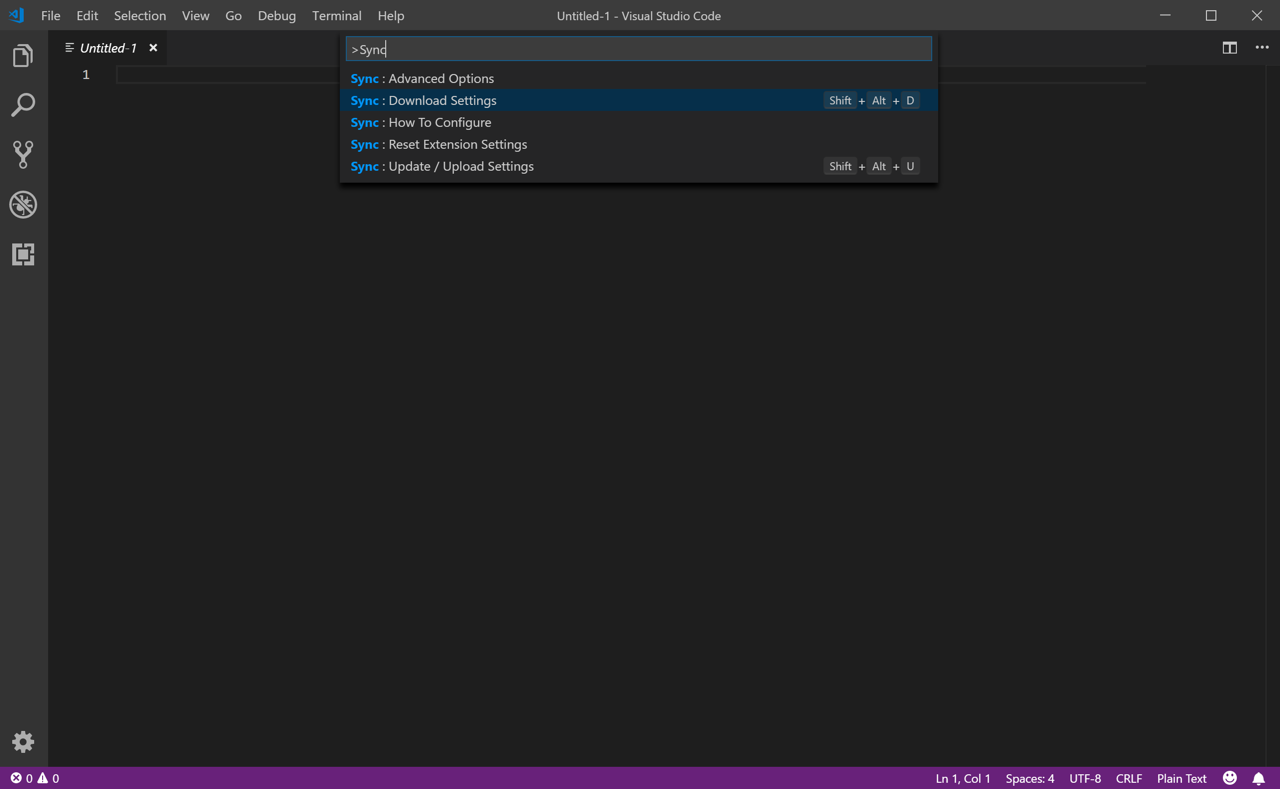
The next step is to configure Settings Sync. We will be doing this using the Command Palette. The Command Palette allows you to run commands using only the keyboard. The easiest way to access the Command Palette is to use the keyboard shortcuts: Ctrl+Shift+P (windows) or Cmd+Shift+P (macOS).
Open the Command Palette and typeSync. Then select the option Sync: Download Settings and hit Enter.
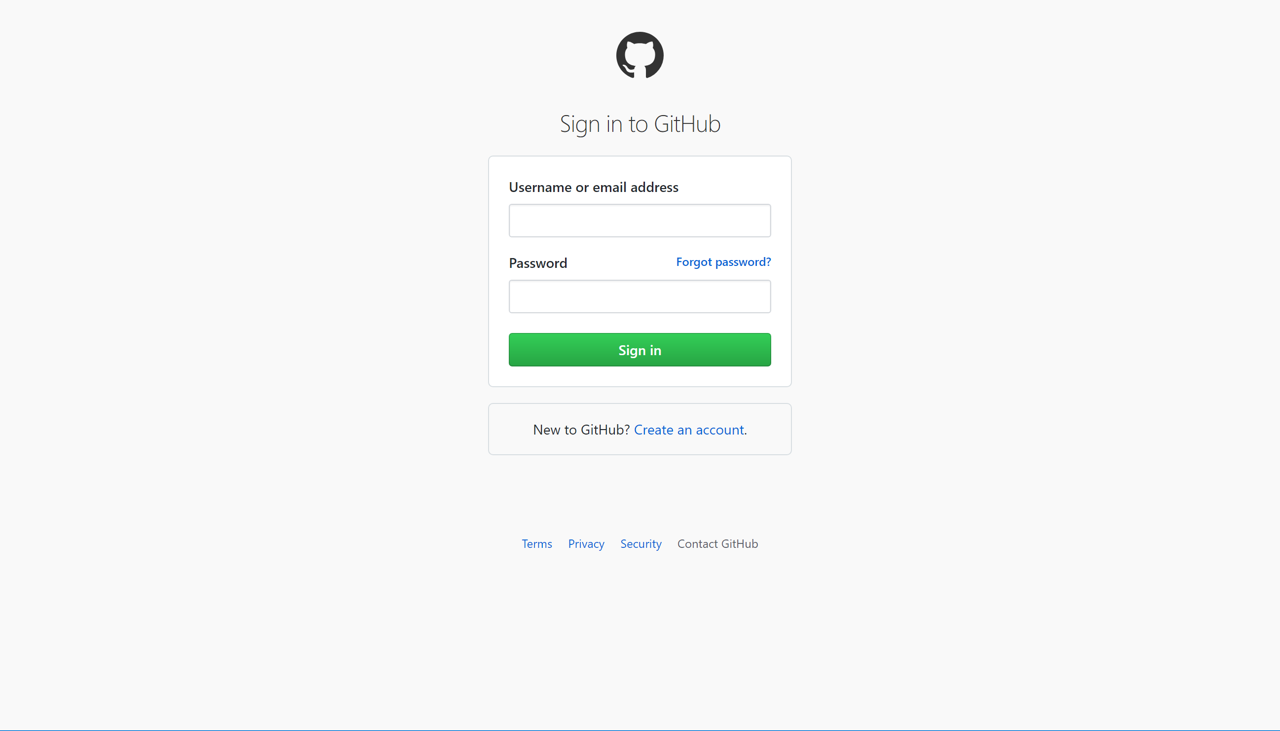
This should immediately open a browser window to GitHub. If you are not already signed into GitHub, you will be presented with the Sign In Screen.
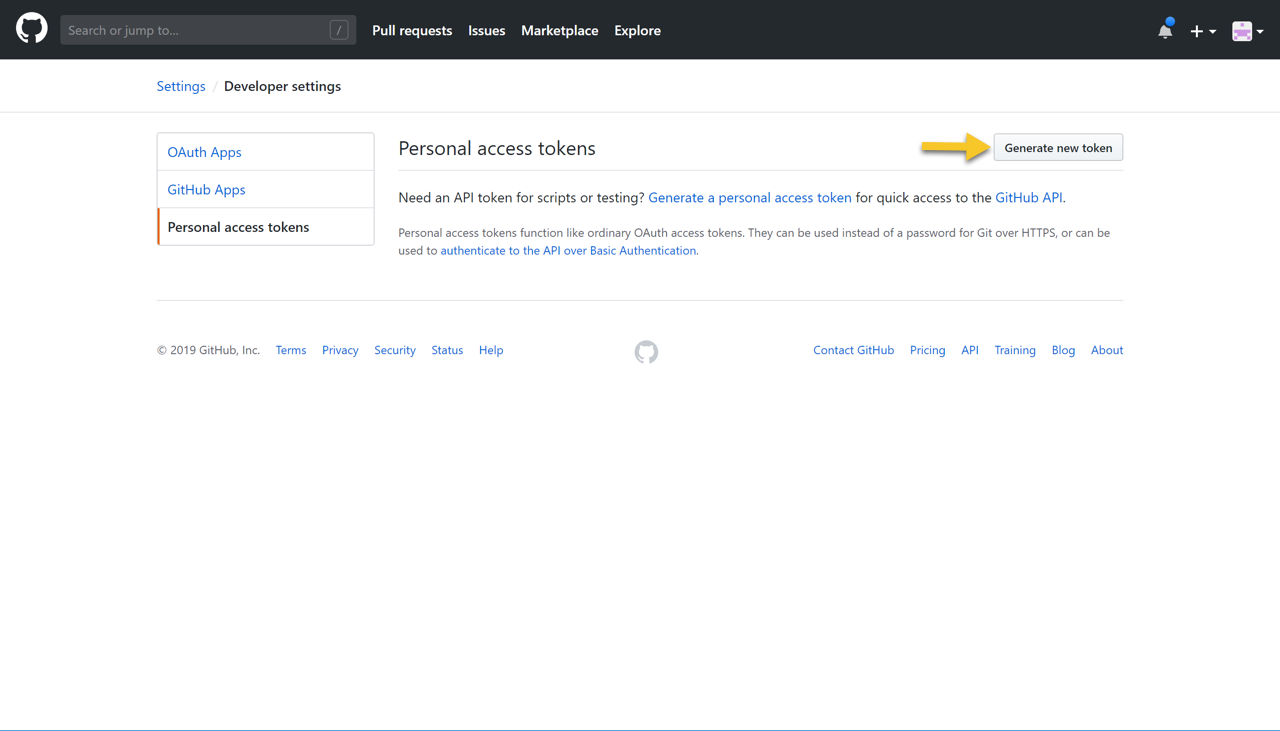
Once you are signed in to GitHub or if you were already signed into GitHub, you should see your "Personal access token" page. In order to use Settings Sync, you will need generate a personal access token. To do this click on the "Generate new token" button. This will take you to the "New personal token" page.
In the "Token description" box, type code-settings-sync.
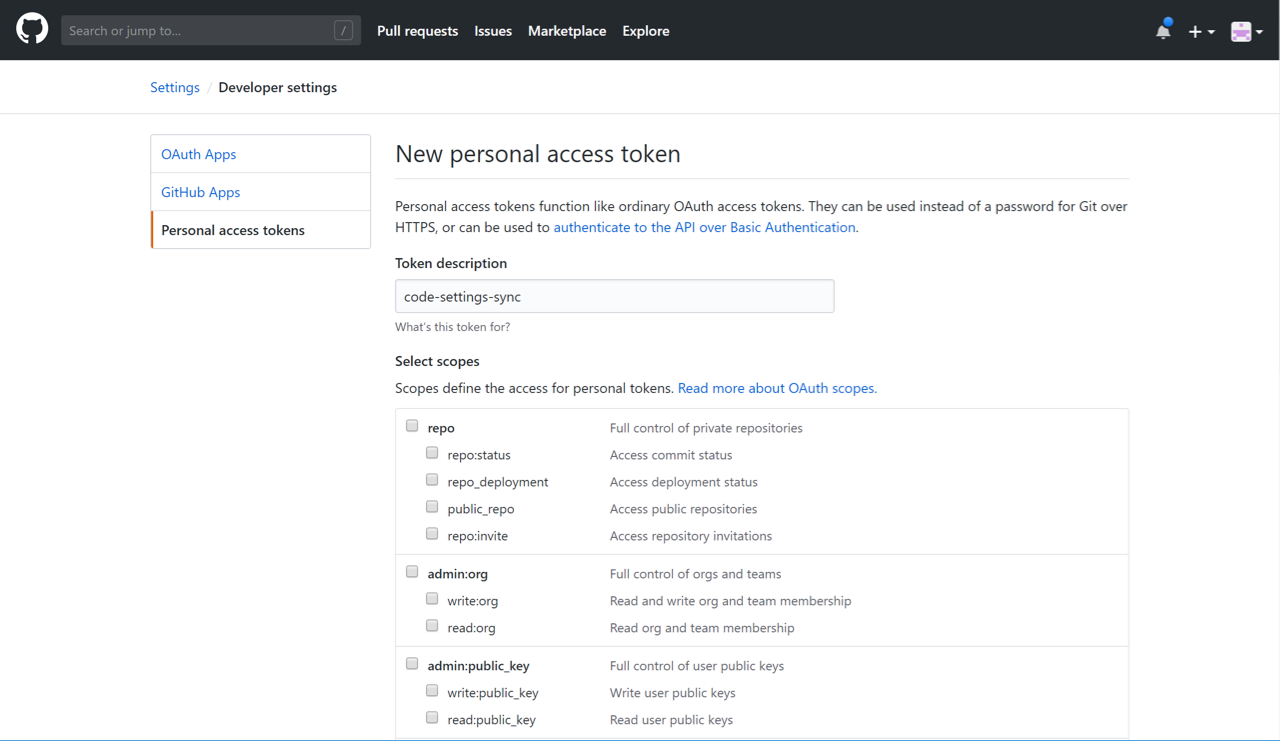
Then scroll down until you find the "gist" section under "Select scopes". Check the box to Create gists.
Then scroll to the bottom of the page and click the "Generate Token" button.
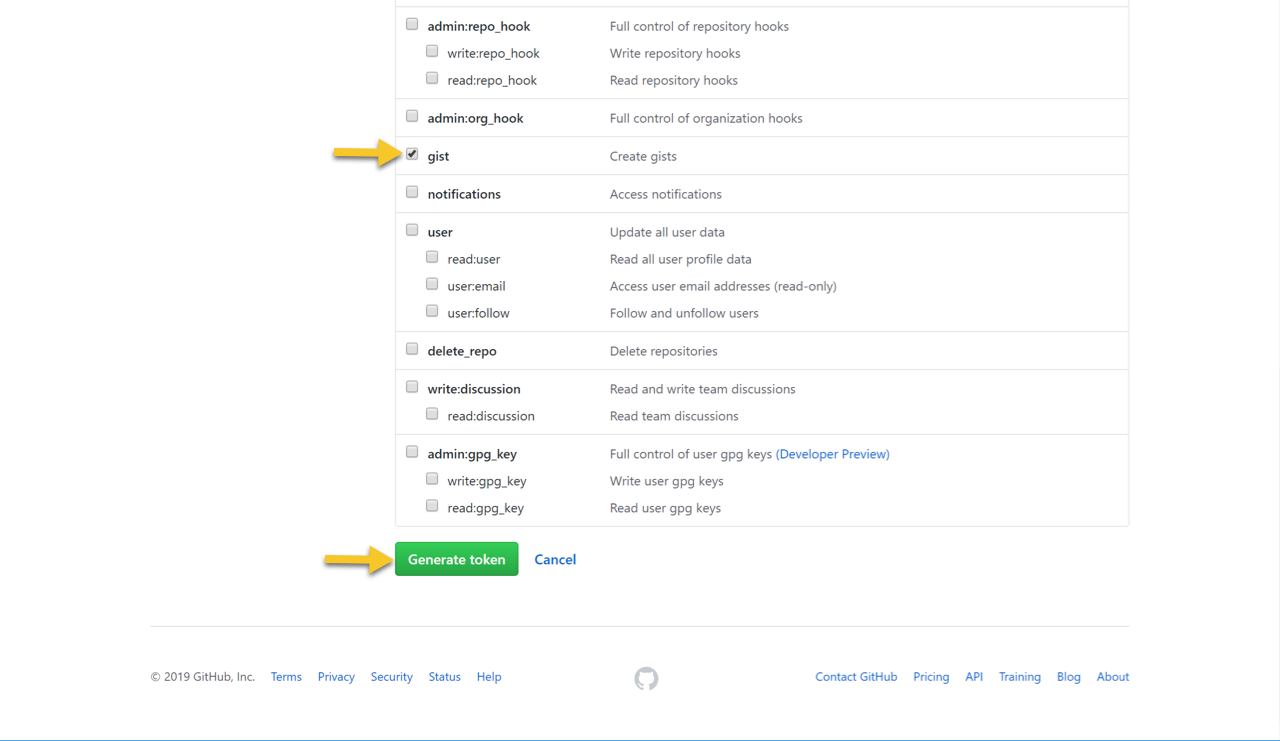
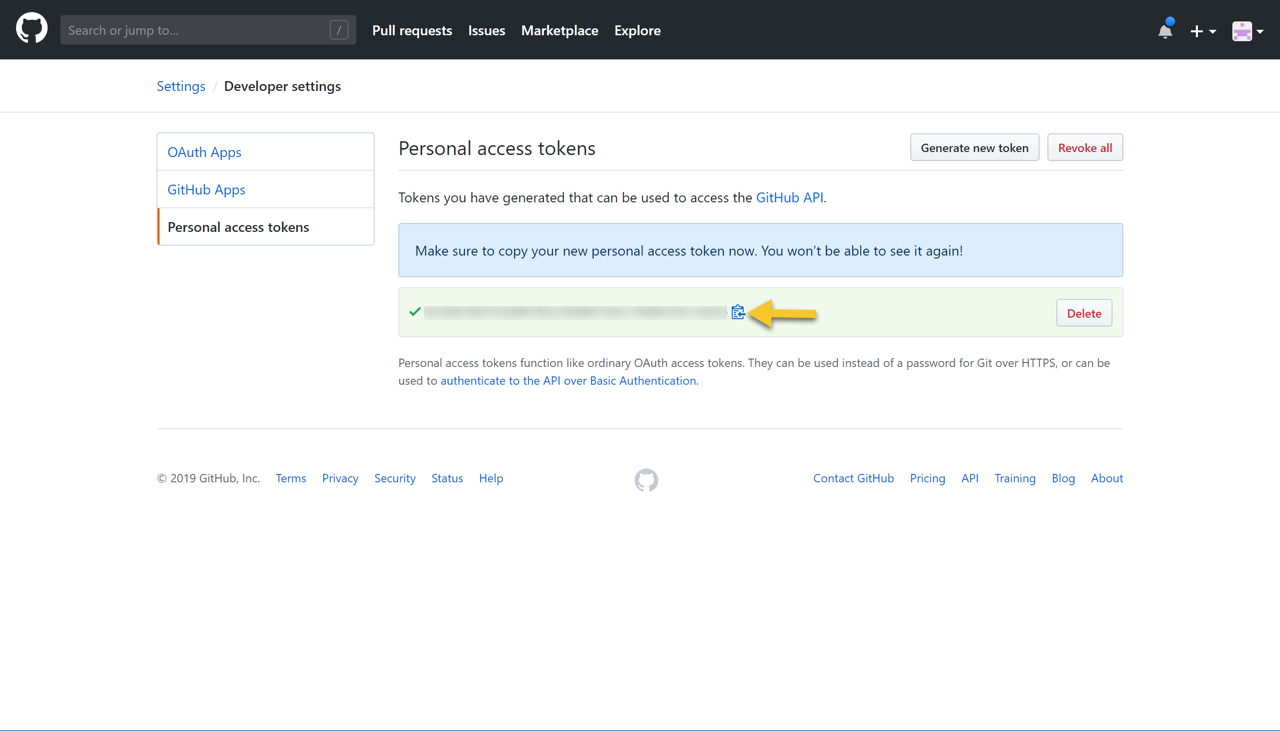
This will generate the token and take you back to your "Personal access tokens" page where you will find your newly create token. You can copy the token by clicking on the clipboard icon.
Important
You must copy your token and save it! A token can never be revealed again and you may need access to it again.
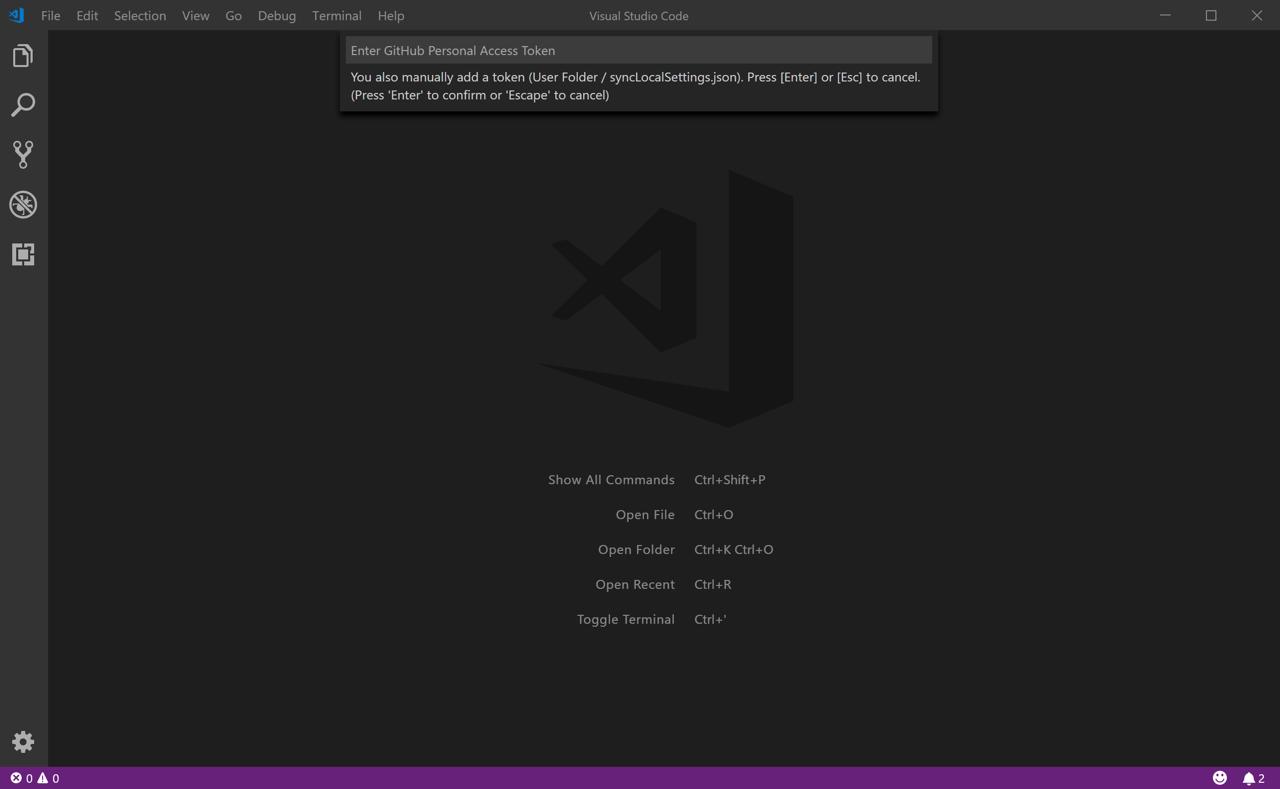
With your token copied, go back to Visual Studio Code. You should see the Command Palette is still open. In the box, paste your Personal access token and hit Enter.
After hitting enter the Command Palette will ask for a Gist ID.
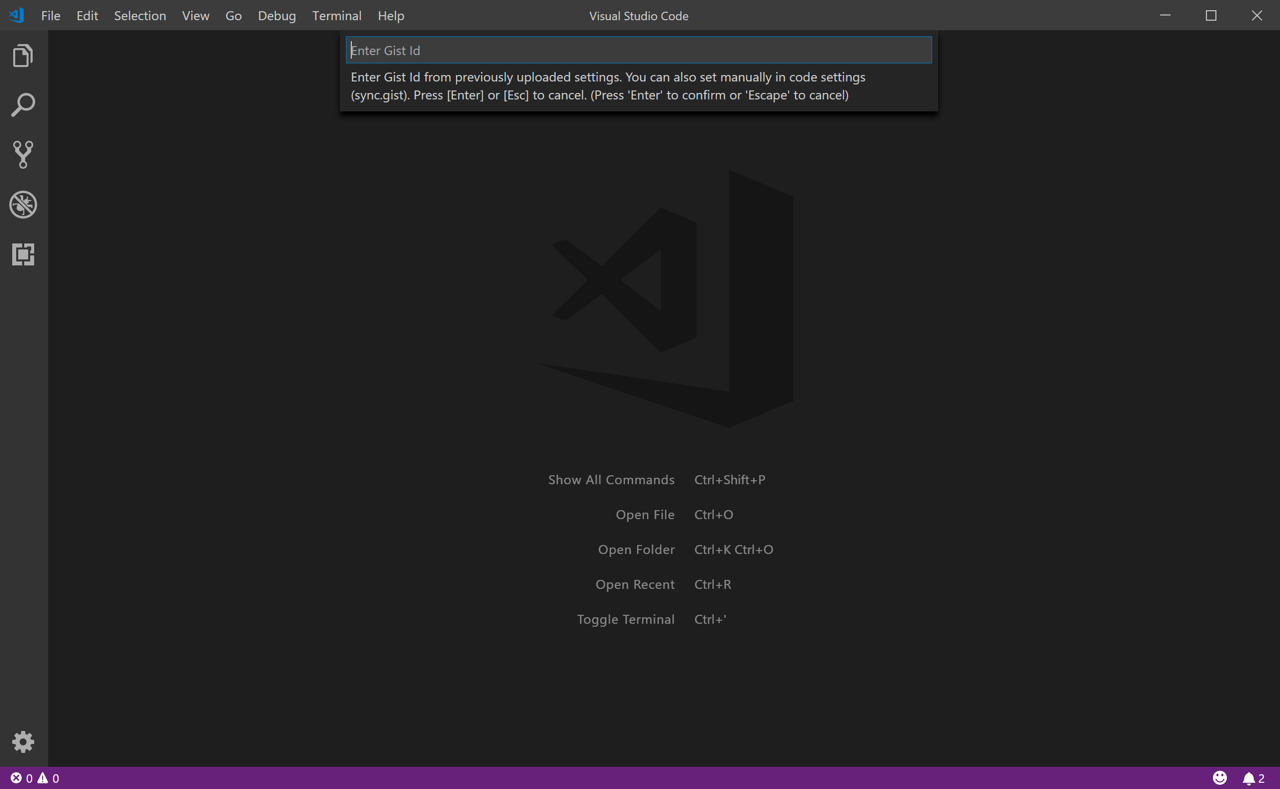
Copy and paste the following ID, 98222e3728959f0009ad03f6268b4468. Then hit Enter.
Settings Sync will download and install all of the settings, themes, and extensions associated with the IMD Package. You can monitor the progress from the Status Bar at the bottom the Visual Studio Code window.
Once the everything has been downloaded and installed, a dialog box will appear asking if you would like to reload Visual Studio Code. Click Yes.
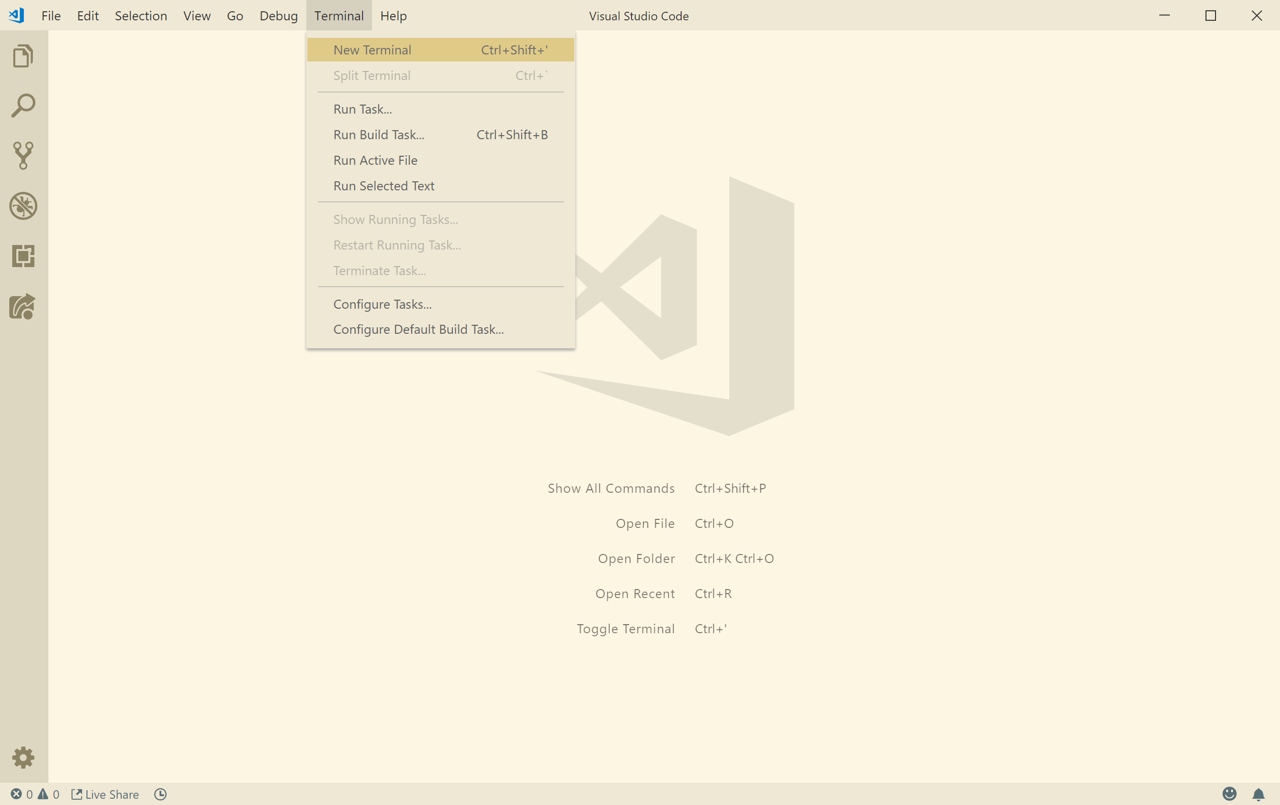
After the window has reloaded, open a new terminal window by going to Terminal > New Terminal.
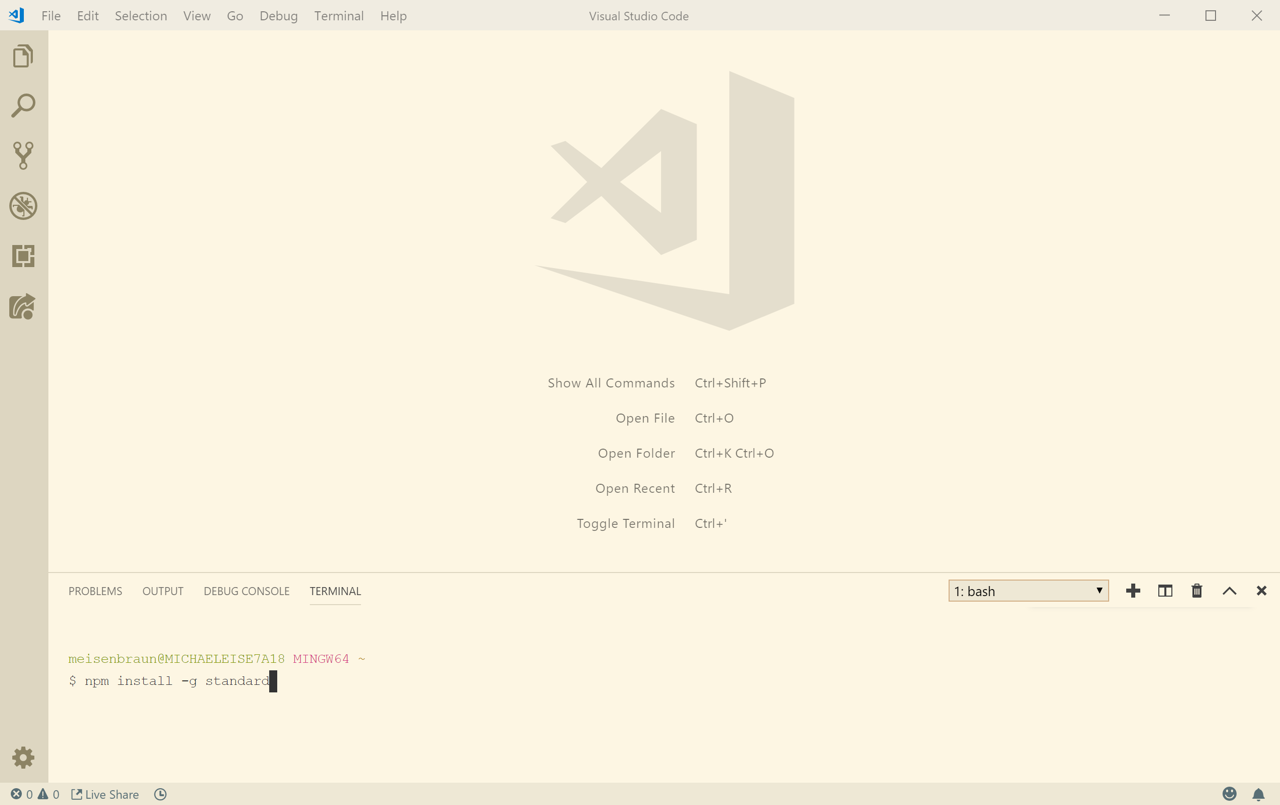
With the Terminal open, type npm install -g standard and hit Enter.
For macOS Only
You may need to use the following command:
sudo npm install -g standard
After hitting enter you will be prompted for your computer password. The cursor will not move as you type your password.
Using Visual Studio Code
Just like any tool, the more you know about it, the better you can utilize it. The following links are documentation and tutorials on how to use Visual Studio Code.
FTP Clients
File Transfer Protocol (FTP) is a standard network protocol used for the transfer of computer files between a client and server. An FTP client is a program that allows users to connect to a web server to download or upload files using FTP. There are many different FTP clients available, free and paid.
WinSCP (Windows Only)
WinSCP is a popular, free SFTP client and FTP client for Microsoft Windows!

Download the latest version of WinSCP from https://winscp.net/eng/download.php. Run the installer and follow the instructions.
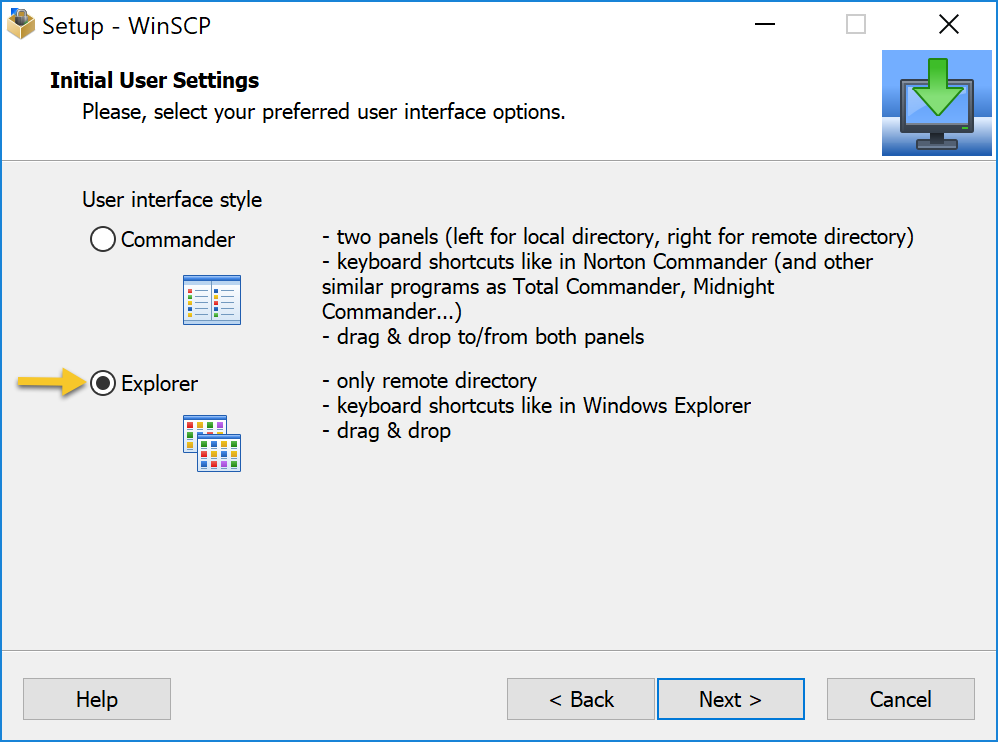
Explorer Interface
During the installation process, it is recommended to choose the Explorer user interface.
Cyberduck
Cyberduck is a open-source client for FTP and SFTP, WebDAV, and cloud storage and is available on macOS and Windows. Cyberduck is free to use.
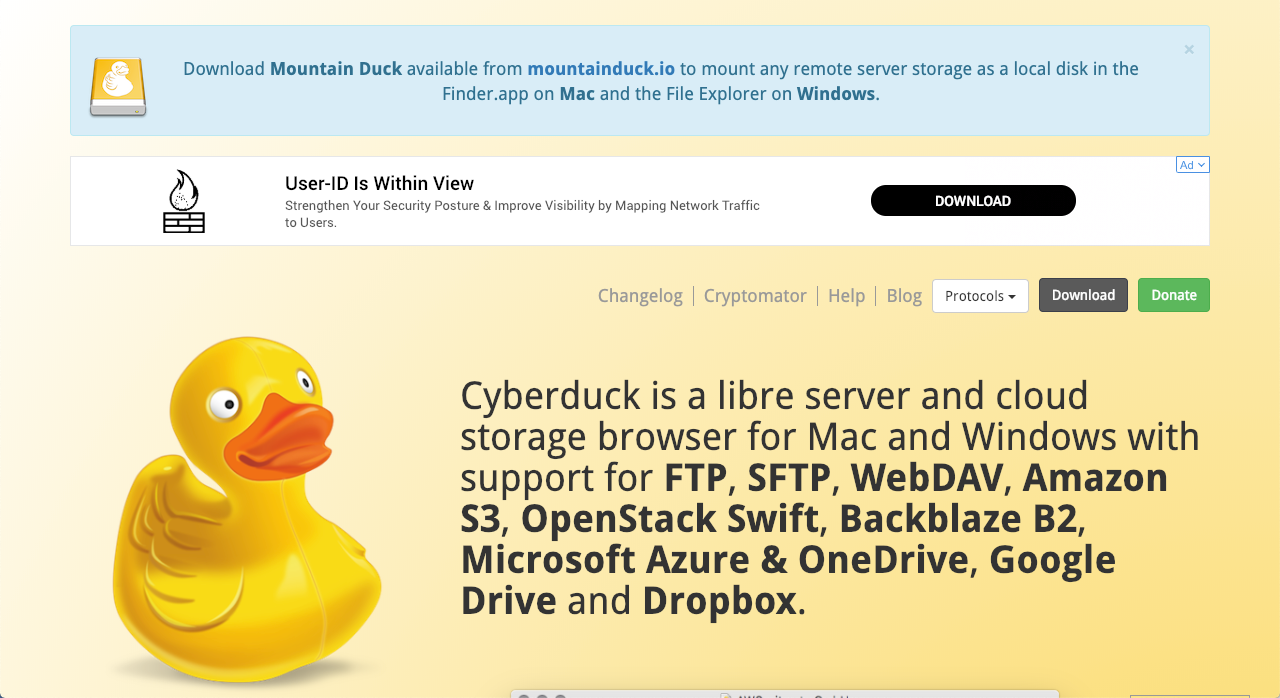
Download the latest version of Cyberduck from https://cyberduck.io/download/. Run the installer and follow the instructions.
Transmit (macOS Only)
Transmit is a paid FTP and SFTP client and is favorite among web developers. It is fast, stable and includes a lot of professional features. Transmit 5 is a ~$60, one-time cost, direct from Panic. Transmit can be purchased as a subscription for $32.99/yr from the Mac App Store.

Additional Learning Platforms
Lynda.com
Lynda.com is a leading online learning platform that helps anyone learn business, software, technology and creative skills to achieve personal and professional goals. All students at Algonquin College can get full access to Lynda.com.

Follow these instructions to get full access.
PluralSight
PluralSight, with assessments, learning paths and courses authored by industry experts, helps businesses and individuals close skills gaps in critical areas, innovate faster and deliver on key objectives. All IMD students have full access to PluralSight.

Check your email for an invite to the service.
Udacity
Udacity is where lifelong learners come to learn the skills they need, to land the jobs they want, to build the lives they deserve. Udacity has both free and paid courses and programs.